
My Maker Mom-in-Residence is humming along and I’m eager to share the things I’ve made and learned. My goal at mHUB is to have some kind of output each week- a 3D print, a carved object, something to demonstrate that I am showing up, growing my skills and knowledge, and making things.
A couple of years ago I interviewed Bob Clagett of I Like to Make Stuff. He told me,
I do my best to try to find interesting projects, not interesting ways to use my skills. The difference there is that once I find a project that is cool, then I figure out what I need to know to accomplish it. I usually only learn the bare minimum to finish the project, but it gives me a baseline knowledge that I can expand later on.
He’s right! I’ve had access to mHUB’s equipment for nearly a year, but it took almost that long before I used my first machine. For example, I knew it would be cool to make something on the Carvey, but until I had a clear idea for a project, I didn’t have the drive to actually try.
Part of my job setting up mHUB’s website involved adding key pieces of equipment to it, often searching the manufacturer’s website for an image. While researching our vacuum former (also called a thermal former), I was gobsmacked by the video on the Formech site that showed how a chef used the machine to make custom chocolate molds. Custom chocolate molds! Thus, my first project was born.
How to Make Custom Chocolate Molds
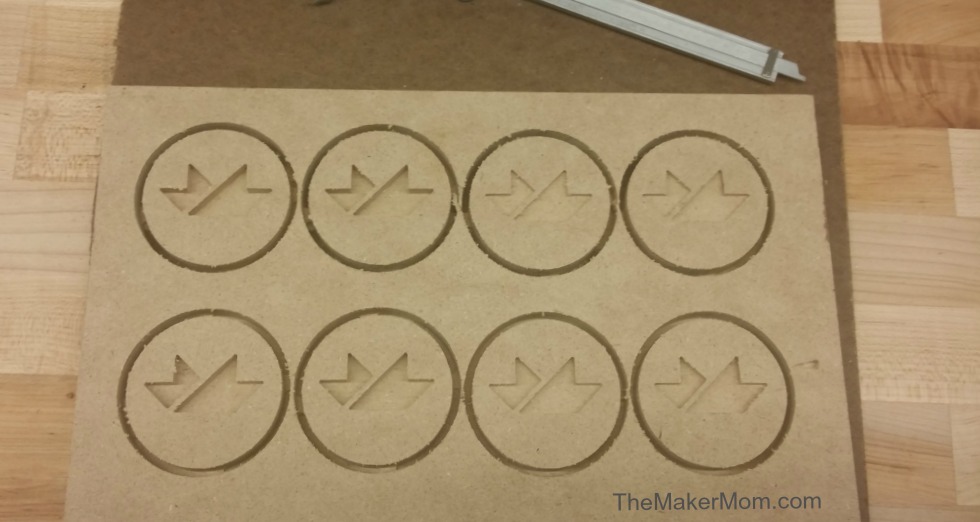
I was determined to make an mHUB chocolate mold. In order to do so, I needed to create objects that the Formech would form its mold around. This would be my first Carvey project.
Carvey is a desktop CNC machine from Chicago-based Inventables. As you might guess from its name, it’s a carving machine. Whereas 3D printing is additive, building layer after layer, the Carvey is subtractive. You put a piece of material into the machine and carve out your desired shape, logo, etc.
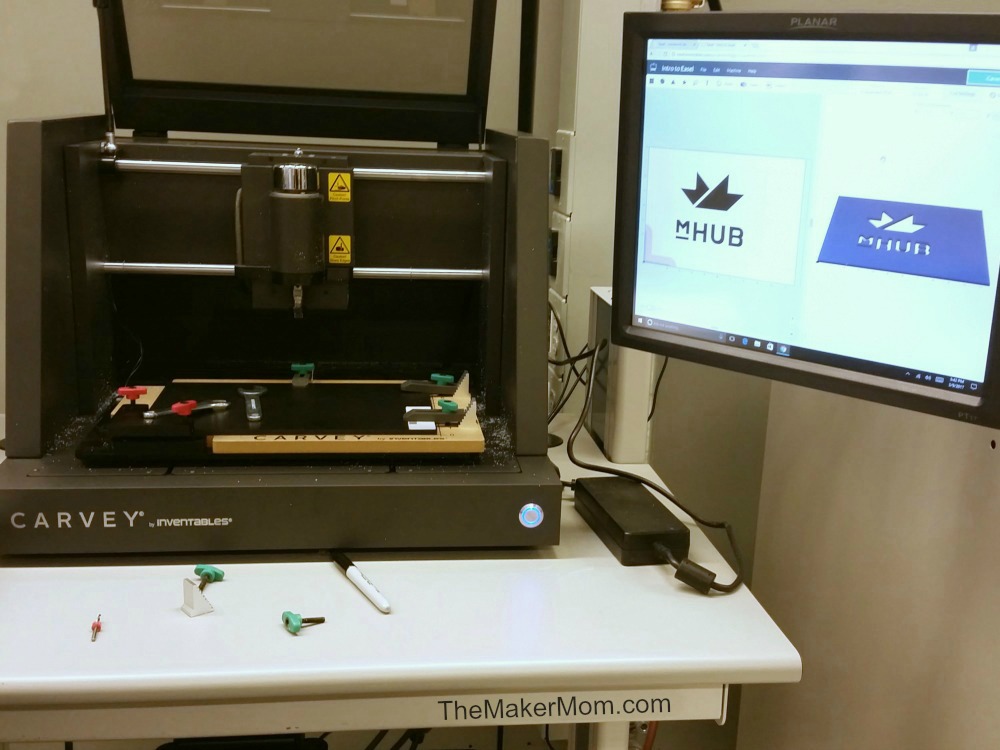
Like any piece of equipment, the Carvey has its pros and cons. One of its biggest pros is that thanks to Inventable’s Easel App, it’s super easy to get started using the Carvey. That said, I invited grabbed a couple of more experienced mHUB members to go through the process with me on my first go-round. I have to admit, I was nervous. I sometimes feel old and slow, my mind so full of decades of clutter that I have to remind myself I am still capable learning new things.
Even though it’s been years since I trained karate, the concept of the beginner’s mind has stayed with me. The beginner’s mind (AKA being a total newb), is more than an admission of cluelessness, though it is partly that. The beginner’s mind is about being open, observant, humble, and ready to learn. I was all of those things.
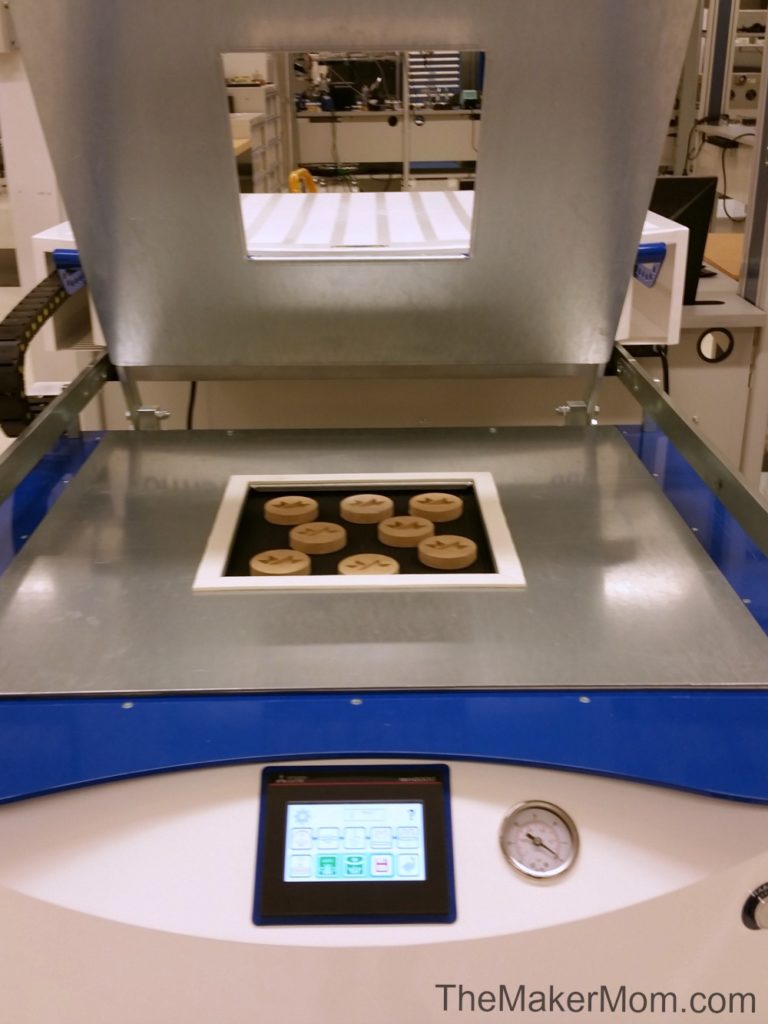
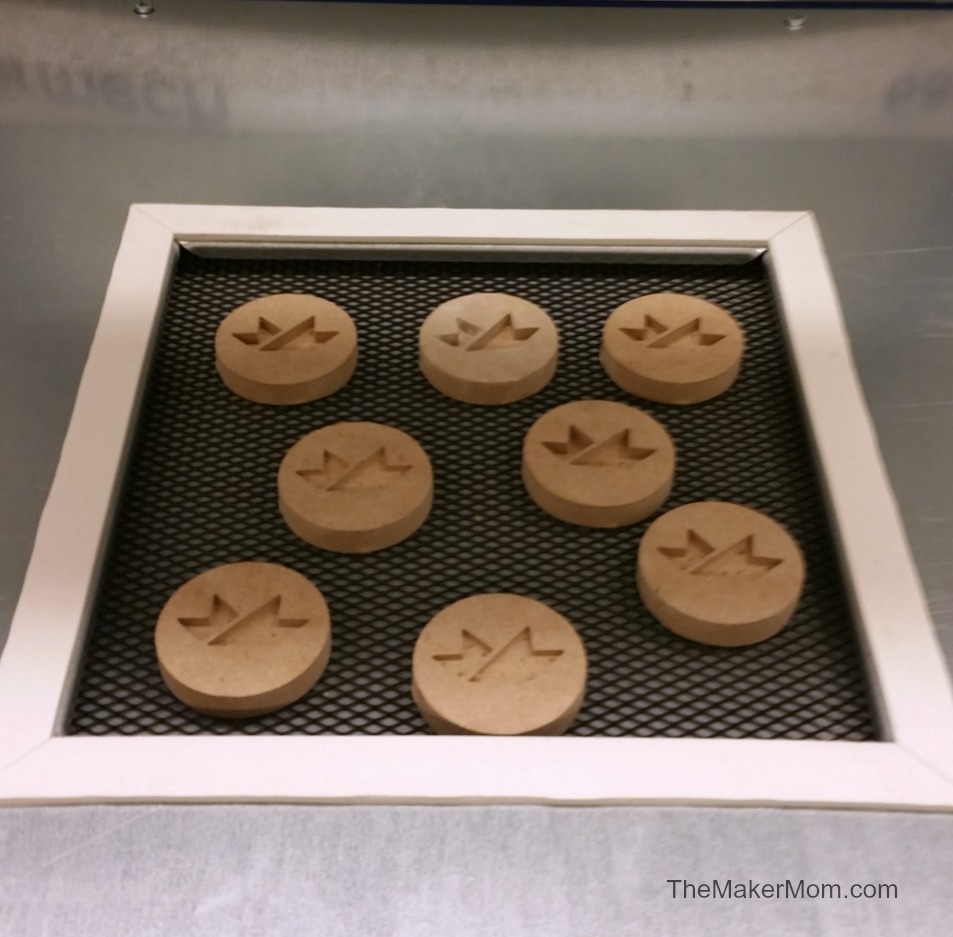
I used the Carvey to produce these hockey puck-like discs with the mHUB logo on them. I later learned that they were not ideal for creating candy molds because they lack draft, but in my defense, I didn’t even know draft, the amount of taper for molded or cast parts perpendicular to the parting line according to Wikipedia, was a thing. And you know what, my discs worked.
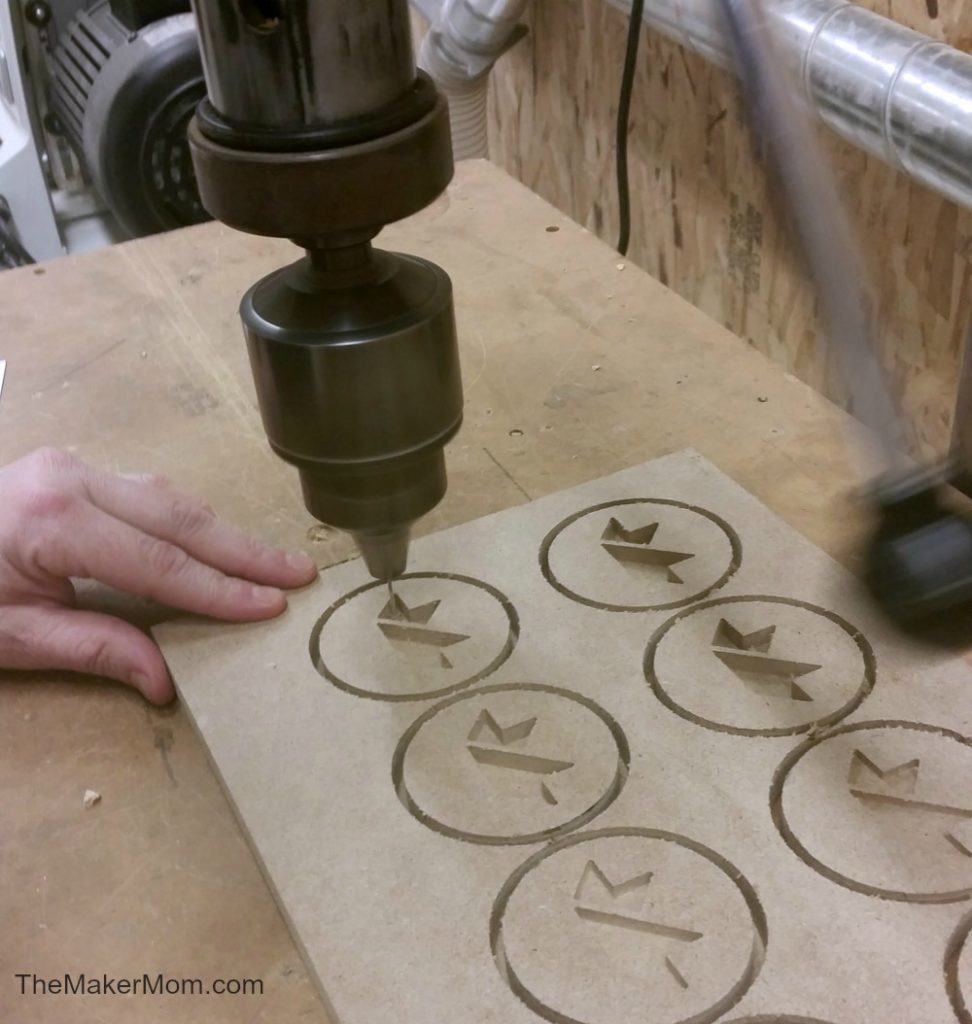
But first, I needed to drill small holes in them prior to vacuum forming. The holes allow the air to flow through the pucks to produce a more accurate mold.
So off to mHUB’s wood shop I went. Indulge me for a moment and watch this brief video of the wood shop that I created when I managed their social media. Fun stuff! And look at all of that equipment.
I drilled a handful of holes in each disk without breaking myself or the equipment. (I tended to accidentally break things when I was a kid and I carry a fear of doing so into adulthood.)
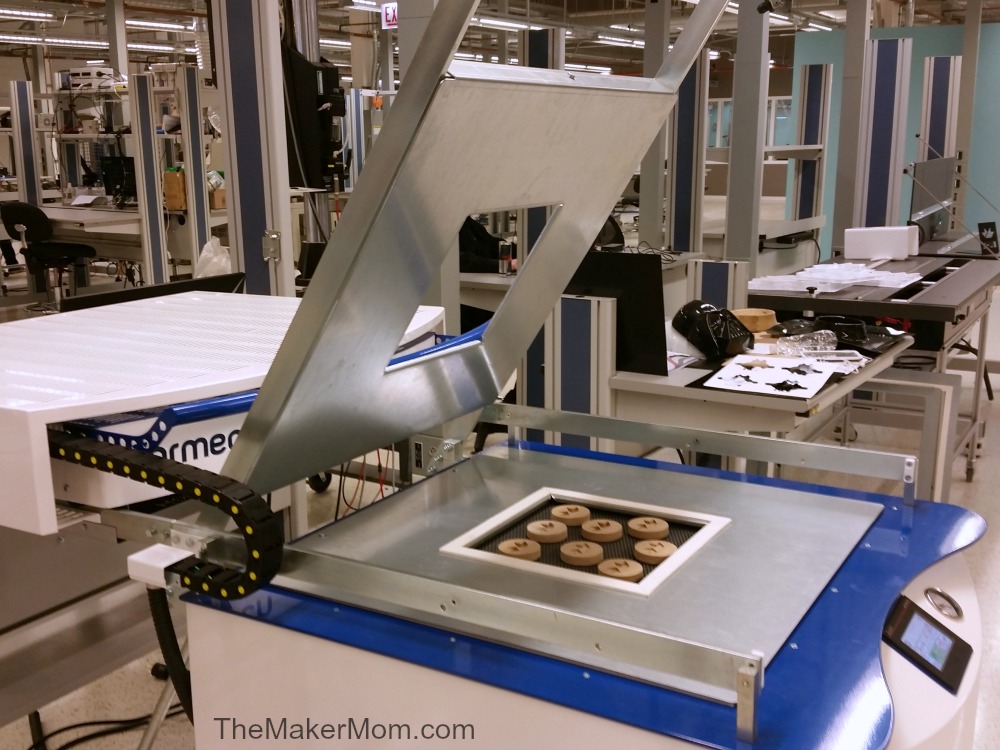
Then it was off to the vacuum former, guided by John Welin, the able shop manager. Clearly, John let me have a heavy hand in things because otherwise the discs would have been evenly aligned. I’m not sure what I was thinking with this haphazard arrangement.
Watch the Formech in action (click below to run the video, which features Emily from DesignHouse:
Cool, right?!
Did I mention that we used food-safe plastic? We made two molds that I brought home and played around with. As noted above, I now understand the importance of draft, but the molds were workable, if not ideal.
I played around with a few variations of the logo and shared the tasty results with my friends at mHUB.
Next up: 3D printing!